
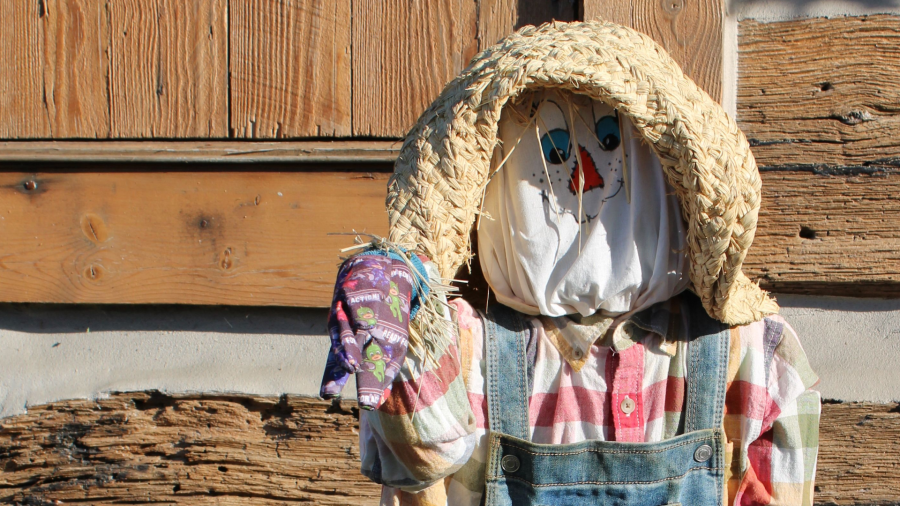
Build Your Own Classic Fall Scarecrow
A classic scarecrow is an easy way to bring a little fall personality to your yard, porch or garden. Better yet, building one is a project the whole family can help make their own.
With a simple wood frame, some straw and a few clothes from home, you can build your own classic fall scarecrow in an afternoon. And your local Rocky’s Ace Hardware has the tools, fasteners and project supplies you need to get started.
Build it. Stuff it. Make it your own.
At a Glance
- Difficulty: Easy
- Time: About 1–2 hours
- Good For: Families, homeowners and beginner DIYers
- Where to Display: Yard, porch or garden
- Adult Help Recommended for: Cutting, drilling and stapling
What You Need to Build a Scarecrow
The basic supplies are straightforward:
- Two wood boards or stakes for the frame
- Exterior wood screws
- Heavy-duty twine or zip ties
- Straw for stuffing
- Burlap sack or similar material for the head
- Work gloves
- Permanent marker or outdoor-safe paint
- Safety glasses
- Drill/driver
- Tape measure
- Saw, if your wood needs to be cut
You can also give old clothes a second life by using a long-sleeve shirt, flannel, jeans or overalls for your scarecrow.
Get Your Scarecrow Shopping List
Step 1: Choose Your Spot
Before you build, decide where your scarecrow will live.
For a garden or yard, choose a spot with firm soil where the frame can be secured. For a porch display, you can place the frame in a sturdy planter or 5-gallon bucket filled with sand or gravel.
Keep your scarecrow clear of steps, walkways and areas where it could tip over or block visibility.
Step 2: Build the Frame
Start with one board or sturdy wood stake about 6 ft. long for the body. Use a second board about 3–4 ft. long for the arms.
Lay the longer board flat, then position the shorter board across it to form a “T.” Place the crosspiece high enough to create natural-looking shoulders once the shirt is added.
Fasten the boards together with exterior wood screws. Pre-drilling the holes can help prevent the wood from splitting.
Tip: If kids are helping with the project, let an adult handle the drill, saw and other cutting tools.
Step 3: Add the Clothes
Slide an old long-sleeve shirt or flannel over the crosspiece. Pull the shirt into position and button or zip the front.
Add pants or overalls below the shirt. Secure the waistband to the vertical post with heavy-duty twine or zip ties.
Don’t worry about making everything perfectly straight. A little personality is part of the fun!
Step 4: Stuff the Scarecrow
Now it’s time to give your scarecrow some shape. Tie off the shirt cuffs, then fill the sleeves and body with straw. Stuff the pants the same way, tying the ankles when you are finished.
Add more or less stuffing depending on the look you want. A loosely stuffed scarecrow will have a relaxed shape while extra straw creates a fuller figure.
Let a little straw stick out around the cuffs and pant legs for that classic fall look.
Step 5: Make the Head
Fill a burlap sack with straw until you have the shape you want. Gather the opening around the top of the vertical post, then secure it tightly with twine.
Use a permanent marker or outdoor-safe paint to add a face. Kids can help create the eyes, nose and smile before the head is attached. Top it off with an old hat if you have one.
Step 6: Add the Finishing Touches
This is where everyone can get creative. Tuck work gloves over the ends of the sleeves to make hands. Add a bandana, fabric patches or other fall accents from around the house.
You can keep your scarecrow simple and traditional or give it a personality all its own.
Step 7: Secure Your Scarecrow
For a yard or garden display, make sure the vertical post is firmly secured in the ground or supported by an appropriate stake or post support.
For a porch, place the frame securely in a weighted planter or bucket filled with sand or gravel.
Check your scarecrow after windy weather and tighten any loose screws, ties or clothing as needed. Bring lightweight decorations inside if severe weather is expected.
Make It a Fall Tradition
When you build your own classic fall scarecrow, you’re doing more than adding another fall decoration. You’re making memories, reusing a few things you already have and creating a character your family can bring back year after year.
Everything you need to get your scarecrow standing tall is at your local Rocky’s Ace Hardware. Download your Scarecrow Shopping List and head over for the tools, supplies and advice to bring this project to life.