A drafty door doesn’t just let in cold air. It quietly drains your wallet every month. According to ENERGY STAR, air leakage accounts for 25% to 40% of the energy used for heating and cooling in a typical U.S. home, and the fix is often simpler than you think.
Introduction
Weather stripping is one of the most cost-effective home improvement projects you can tackle on a weekend. It seals the gaps around doors that let conditioned air escape and outside air sneak in, and it does so without requiring professional skills or expensive tools.
The challenge is choosing the right material for each door type. A sliding glass door needs a completely different solution than a garage door or a front entry. Getting that match wrong means buying twice.
This guide covers every major door type, the materials that hold up longest, and the installation steps that make it easier to get a tight seal the first time. Knowing which product fits your specific situation is the difference between a fix that lasts a season and one that lasts a decade.
What Weather Stripping Actually Does (And Why It Matters)
Weather stripping creates a continuous seal around a door frame, blocking the gaps that quietly waste energy all year. Those gaps have a surprisingly large impact on comfort and cost, making weather stripping one of the simplest upgrades a homeowner can make to improve efficiency and reduce drafts in any season.
Here is what properly installed weather stripping does for your home:
- Reduces energy loss: According to ENERGY STAR, air leakage accounts for 25% to 40% of heating and cooling energy use in U.S. homes.
- Cuts utility bills: The U.S. DOE estimates the average homeowner spends $2,200 per year on heating and cooling. Sealing air leaks can cut that by 5% to 30%, according to Electric Choice.
- Blocks pests and moisture: Gaps that let air through also let in bugs, dust, and water.
- Delivers fast payback: Pro House Maintenance reports an average fix cost of $650 with estimated annual savings of $280, a payback period of roughly 2.3 years.
- Lasts for years: Properly installed weather stripping can maintain effectiveness for 15 to 20 years under normal conditions, according to Five Seasons Windows.
Types of Weather Stripping Materials That Actually Work
The three most common weather stripping materials work well in different situations, and choosing the right one depends on where the door is, how often it opens, and what climate you live in. Matching the material to those conditions is what separates a lasting seal from one that fails within a season.
V-Strip (Tension Seal)
V-strip, also called tension seal, is a folded piece of metal or plastic that springs open to fill a gap along the sides of a door frame. Metal V-strip can last 20 or more years on a properly installed door, making it the longest-lasting option available, according to Family Handyman. It’s the right tool for high-traffic entry doors where durability matters most.
Foam Tape and Tubular Rubber
Foam tape is the easiest to install and the most affordable, but open-cell foam loses compression within 3 to 6 months. Closed-cell foam, such as EPDM or neoprene, maintains compression for 2 to 5 years, according to HVAC Seer. Tubular rubber sits in the middle: more durable than foam tape and better suited for doors that see daily use.
Felt and Door Sweeps
Felt is the most basic option. It works for rarely used interior doors but wears quickly in wet or high-traffic conditions. Door sweeps attach to the bottom of the door and seal the gap between the door and the threshold. They’re essential for exterior doors, where that bottom gap can equal the airflow of a hole in your wall. Always install any adhesive-backed product when temperatures are above 40°F for proper adhesion, per the Home Depot Weather Stripping Buying Guide.
How to Choose the Right Weather Stripping for Your Door
Picking the right weather stripping starts with measuring the gap and matching the material to the door’s use and location. Most residential door gaps fall between 1/8 inch and 1/2 inch, according to Window Hardware Direct. Gaps over 1/2 inch may signal structural issues that need attention before you buy anything.
Key selection factors include:
- Traffic level: High-traffic entry doors need V-strips or tubular rubber. Rarely used doors can get by with felt or foam.
- Gap size: For soft materials, choose a product 1/16 to 1/8 inch thicker than the measured gap to ensure compression, per Engineer Fix.
- Climate: Silicone weather stripping handles temperature swings best and lasts 10 or more years with minimal maintenance, according to Elastostar.
- Material durability: EPDM rubber holds the largest market share at roughly 60% of total revenue, driven by its superior durability and weather resistance, per Business Research Insights.
Finding Drafts Before You Buy
Don’t guess where the gaps are. Hold a lit incense stick near the door frame on a windy day. If the smoke moves, you’ve found a leak. The dollar-bill test also works: close the door on a bill and pull it out. If it slides easily, the seal is too loose, according to Window Hardware Direct. For a full picture, a professional blower door test pinpoints every leak location in the home.
Weather Stripping for Entry and Exterior Doors
Entry doors are the highest priority for weather stripping projects. A 1/8-inch gap under a standard 36-inch door creates roughly the same airflow as a 2.4-inch hole in the wall, according to My Flood Tape. That’s a significant amount of air exchange happening every hour.
The right approach for exterior doors includes:
- Top and sides: Use V-strip or tubular rubber for the door stop area. These handle repeated compression from daily use.
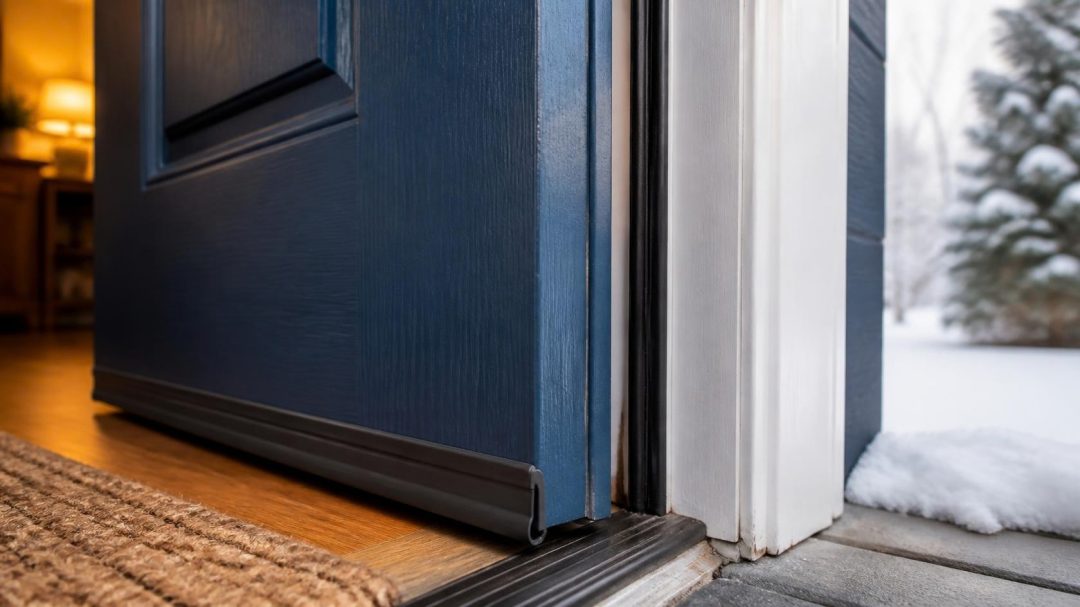
- Bottom gap: Install a door sweep or automatic door bottom for the best seal against the threshold.
- Replacement schedule: Weather stripping on a frequently used front door should be replaced every 2 to 5 years depending on material and climate, per Frame-Well.
- Energy impact: Weather-stripped entry doors can reduce heating and cooling costs by 10% to 25% annually, according to Five Seasons Windows.
Weather Stripping for Sliding Glass Doors
Sliding glass doors cannot be fully sealed against air leakage while still allowing the door to operate, according to Gladiator Window and Doors. Because stopping all leakage is impossible by design, the goal is to minimize loss as much as possible using the right sealing approach for this door type.
Here is what works best for sliding doors:
- Pile with fin weatherstripping is found on approximately 90% of U.S. sliding doors, per All About Doors. The plastic fin blocks air and the fuzzy pile stops bugs and light.
- Pile height matters: Common sizes are 1/4 inch, 5/16 inch, or 3/8 inch. Going too tall causes the door to drag. Measure the plastic backing, not the door itself.
- Silicone or vinyl seals last 8 to 10 years and cost $20 to $50, making them the longest-lasting option for sliding doors, per Home Repair Trail.
- Energy savings: ENERGY STAR qualifying sliding glass doors achieve annual savings of $150 to $400 per door for typical residential installations, according to Madison Door.
Weather Stripping for Garage Doors
Sealing a garage door is one of the fastest ways to cut home heating costs, since an uninsulated attached garage can increase total home heating costs by 10% to 20%, per U.S. DOE estimates cited by Advanced Door. Addressing that gap directly reduces the energy loss that attached garages consistently cause.
Garage door weather stripping projects cover three areas:
- Bottom seal: This rubber or vinyl strip takes the most abuse. It costs $20 to $60 for materials and needs replacement every 2 to 3 years for vinyl, or every 5 to 7 years for EPDM rubber, per AA Garage Door.
- Side and top seals: These foam or rubber strips run along the frame. They’re often overlooked but critical for a complete seal.
- Full replacement impact: A complete seal replacement can reduce garage air infiltration by 50% to 70% and often pays for itself within one heating season, according to Cunningham Door.
How to Install Weather Stripping on a Door
Installing weather stripping on a single exterior door takes only 1 to 2 hours and is rated an easy DIY project, according to Reliant Energy. Having the right tools on hand before starting makes it easier to get a clean, lasting result without having to redo sections.
Tools and Materials Needed
You don’t need much to get started. Gather these before you begin:
- Tape measure: Measure the full perimeter of the door and add 10% for waste and cuts, per This Old House.
- Utility knife or scissors: For cutting foam tape, felt, or vinyl to length.
- Hammer and finish nails: For nail-on metal V-strip, drive nails at 6 to 8 inch intervals starting at the top, per Family Handyman.
- Drill and bits: For installing door sweeps. Hold the sweep so it just touches the threshold, mark pilot holes, and confirm contact across the full width before securing, per This Old House.
- Cleaning supplies: Wipe the frame clean before applying any adhesive-backed product.
For adhesive foam or bulb-style strips, position them so they compress slightly along their entire length when the door closes, not just at contact points, per Ace Handyman Services. The U.S. DOE confirms that caulking and weather stripping costs are typically recovered in energy savings within one year.
Seasonal Tips and Troubleshooting for US Homeowners
Timing and location both affect how well weather stripping projects turn out. For adhesive-backed products, install on a day when temperatures are at least 60°F for best results, with 40°F as the minimum threshold, per One Hour Heat and Air. Getting those conditions right helps the adhesive bond properly and last longer.
Practical tips for U.S. homeowners include:
- Inspect before peak seasons: Check seals before winter and summer. Replace compressed or cracked strips every 2 to 3 years to keep energy costs down, per Frame-Well.
- Regional cost awareness: Professional installation costs vary widely. In the Northeast (New York), expect $142 to $672 per door. In the Southeast (Georgia), costs run $85 to $404, per HomeGnome.
- Look for assistance programs: The U.S. DOE announced over $400 million in 2025 for energy-saving weatherization programs, including $325 million in Weatherization Assistance Program funds for all 50 states, per DOE Energy.gov.
- Real results: A Michigan homeowner reported drafts dropped by 80% and $300 in winter heating savings after using foam tape, V-strips, and a door sweep, per SmartWeatherize.
Conclusion
Weather stripping is one of the most practical home improvement projects available to U.S. homeowners. It requires minimal tools, costs far less than most home upgrades, and delivers real energy savings that show up on your utility bill within the first season.
The key is matching the right material to each door type. Entry doors, sliding glass doors, and garage doors each have specific needs, and choosing correctly means the fix holds up for years. Stop by your local Rocky’s Ace Hardware and let our knowledgeable team help you find the right tools and materials for every door in your home.
Frequently Asked Questions
How much does weather stripping cost in the United States?
DIY weather stripping costs as little as $60 for a standard exterior door, while professional installation averages $283 per door, according to HomeAdvisor. A full garage door weather stripping package runs $100 to $250 for materials or $200 to $400 with labor. Costs vary by region: Northeast homeowners typically pay more than those in the Southeast, where rates run $85 to $404 per door.
Is weather stripping worth it for United States homeowners in all climates?
Yes, weather stripping delivers savings in every U.S. climate. A Texas homeowner reported a 20% drop in cooling costs after installing weather strips, while an Ohio family saw a 25% reduction in heating bills, per Window Hardware Direct. Hot and cold climates both benefit because conditioned air escapes through gaps year-round, not just in winter.
How long does weather stripping actually last?
Lifespan depends heavily on material. Metal V-strip lasts about 5 years on high-traffic doors, while interlocking metal can last a lifetime, according to Angi. EPDM rubber garage door seals last 5 to 7 years. Foam tape wears fastest and may need replacement every 2 to 3 years on a main entry door. Inspect seals before each heating and cooling season.
Can I install weather stripping myself, or should I hire a professional?
Most homeowners can handle a standard door project without professional help. Labor accounts for approximately 80% of total project costs when hiring a pro, per HomeAdvisor. If the door is warped or the frame has shifted due to foundation settling, door adjustment or frame repair should come first, according to Armadillo. Weather stripping alone won’t fix a structural gap.
Are there government incentives for weather stripping projects?
Yes. The energy-efficient home improvement tax credit covers 30% of costs, for total savings of up to $3,200, per the U.S. Department of Energy. The DOE also disbursed over $400 million in weatherization program funds in 2025, available to qualifying households in all 50 states. Check with your state energy office to find local programs that may cover part or all of your project costs.